Test INT 13H for the second time

In this post, you can read how I wrote a program to discovered the currently
installed version of the INT 13H extension on the BIOS of my computer.
As you know, I was learning how to read and write on hard disk with use of the
INT 13H service. I tested already that the INT 13H extension for
Logical Block Addressing mode (LBA) was effectively available on my
IBM T41. The point is that the test of INT 13H returns also the
version of the extension currently installed.
In the past, I didn't take care of retrieving the information about the
installed version (as you can see in
Fig. H
of the post
"Learn read before you write") and that turned to be a small problem that I had to fix. If you look at the
"Ralf Brown Interrupt List"
you will read that one can perform a "write only" action or a
"write and verify". It doesn't say much more about what the verification indeed is, but I
thought that verifying whether the writing on disk was successful or not, was
in principle a good idea and I wanted to use that. The problem was that
depending on the currently installed version of the INT 13H extension,
there are two different values (or syntaxes) for AL in case you want to verify
the writing on disk (AL = 0x01 until version 2.0 and
AL = 0x02 from version 2.1 and above). As a consequence, I had to
test the INT 13H LBA-Extension again, but this second time, I had put on
screen the values of registers AX, BX, CX and DX in such a way that I could
figure out which version was installed and use the appropriate value for AL.
First of all, I made some fine-tuning of the programs of the past and I created two new service procedures (show_string_II and write_ASCII), then I made the new main program TEST_LBA. You find TEST_LBA source script in the DOWNLOAD AREA meanwhile, I show here some fragments of the assembly protocol1 created with DEBUG.EXE to describe some aspects that I found important. After that, I show my usual tests with DEBUG.EXE before running the program on the real PC.
The main program
I want you to observe that this procedure is not a service but a final bootable one. It is not reallocatable but fixed at 0x07C00 memory address.
At SEG:7C00, I placed a long jump which went over the service procedures and, at the same time, began the initialization of CS and IP, which then continued in the program block "general_reset" at address line SEG:7CE7. The code tested the INT 13H extension and, if available, converted the registers AX, BX, CX and DX in ASCII before sending the message on the screen. In the end, I produced directly SOFTWARE.BIG as a binary that comprised everything (main program, service procedures and data) from 0x7C00 until 0x7D38. Before putting SOFTWARE.BIG on the ROOT folder of my bootable test partition, I did some tests in DEBUG.EXE
Testing with DEBUG.EXE
In my previous post "Learn read before you write", I talked about a lot of things and I didn't show you how I did the test of the procedure with DEBUG.EXE, but I presented immediately the executed result in Fig. H. Probably, you were curious to know about how I did the test, so I prepared the screenshots for you this time.

|
| Fig. A - Check of the entry point |
In Fig. A, you see how I loaded SOFTWARE.BIG at memory address 0x7C00 and I started testing that the entry point, with the long jump, was working correctly. The jump worked as it should and changed CS and IP at the same time (marked in yellow). Immediately after, I had to correct manually the value of the segment CS to bring it back at the same value as all other segment registers in DEBUG.EXE (marked in blue). The test environment is not the same as the real mode, so I had to do this kind of adjustment, but after that, I saw my target instruction (CLI marked in yellow at address CS:7CE7) and I knew that the entry point was working as expected.

|
|
Fig. B - Check the error message |
In Fig. B, you see the continuation of the test. The initial instructions, marked in yellow, were pointing and printing the initial part of the message. The central block of instructions, marked in green, performed the INT 13H installation check. Within DEBUG.EXE the check returned a carry flag set, meaning that within DEBUG.EXE there was no LBA extension available (more precisely, there is no emulation implemented for that). You can look at the instruction marked in red and see how the program took the jump and the way out. From that point on, I followed one of the two possible paths, and I verified that the code was working on that path (instructions marked in yellow).

|
|
Fig. C - Check the good return message |
Once I knew that the first path was ok, I went back, with a manipulation of the IP register (marked in blue in Fig. C), on the point where the code branched. This time the carry flag was not set (NC = No Carry marked in green) so I could also test from that point on the other path of the code. In Fig. C, marked with brown colour, you see the sequence that pushed on the stack the registers and entered the loop used to convert them into ASCII.
")
|
|
Fig. D - Check the good return message (continued) |
In Fig. D, you see the remaining instructions of the conversion routine marked in brown. I hope you noticed that since I was using the command p, the complete loop was executed all in once, as you can tell by the loop counter CX that went immediately to zero (marked in red). The latest group of instructions (marked with yellow) brought the return message on the screen.
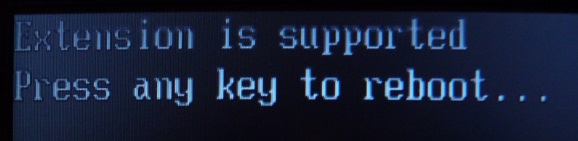
After the test, I put the file SOFTWARE.BIG immediately on the root folder of my bootable test partition. The space shuttle found and loaded it. In Fig. E, you can see the first line "Loaded!" (which is the feedback that the space shuttle brings on-screen meaning that his job is done). After pressing a key the control passed to the file SOFTWARE.BIG (in this case it contained TEST_LBA). The following 3 lines were the output of TEST_LBA. Finally, I knew to have the version 3.0 of the Extended Disk Drive (EDD) with a lot of extra functions which I was not planning to use except for the write with verifying by setting AX = 0x4302.

|
|
Fig. E - TEST_LBA runs in real mode |
Comments
Post a Comment