Check Teletype Write

Everybody knows Ralf Brown and appreciate his great job with the documentation of the interrupts and, of course, I do appreciate his work as well. Having said that, it would make me happy if one-day Ralf Brown was reading this post and maybe leaving a comment. Why? Because during the learning step described in my previous post "Experiments with the cursor" I found out that the BIOS interrupts INT 10h/AH=0Eh was not quite working as it should according to the description given in the "Ralf Brown Interrupt List" so I decided to dig a little bit deeper and make some extra tests.
Preparation of the test

|
|
Fig. A - Description of INT 10h/ AH=0Eh taken from the
delorie web page |
I marked with a red arrow the register BH of Fig. A because, as I am going to show in this post, the INT 10h/AH=0Eh doesn't use the register BH at all and always writes on the current active video page on the screen. For a long time, I searched the internet to find out if I could find some other source of information about the BIOS INT 10h/AH=0Eh, its behaviour and the purpose of the register BH. I found a lot of different web pages all stating the same as the "Ralf Brown Interrupt List" (I suppose that everybody refers to it so that the information is just replicated). The only reference that I was able to find which states something different (although in a very mysterious way) is the "Programmer's guide to the EGA, VGA and Super VGA cards" by Richard F. Ferraro on page 20, Table 2.6 (see Fig. M of the post "Experiments with the cursor").
How did I test that the BIOS INT 10h/AH=0Eh does not use the register BH at all? It is a long story, full of details but, once explained, easy to understand. I had the idea to write messages to different video pages and then switch the pages the see the effect. I expected BIOS INT 10h/AH=0Eh not to work, so I also designed an alternative code (which did write on the different video pages correctly) to make the results even more evident through comparison. Until now, I used a procedure called _SHOW_STR 1 with BIOS INT 10h/AH=0Eh to write on the screen, however, I could not use this procedure "as is" because it hardcodes BH=0x00 and I wanted to be able to change the value of BH programmatically this time. For this reason, I designed a local procedure .TTW_A: (stands for TeleType Write variant A).

|
| Fig. B - Code's comparison between _SHOW_STR and .TTW_A: |
As you can see in the code's comparison of Fig. B, I only changed one instruction from MOV BX, 0x07 (which makes also BH=0x00) to MOV BL, 0x07. In this way, the procedure .TTW_A: gets in BH the value of the video page to write to. At this point, the local procedure .TTW_A: was ready to demonstrate that, regardless of the value used for the register BH, INT 10h/AH=0Eh was just ignoring BH and always writing on the currently active page of the screen. Additionally, I decided to write a second procedure that used the same interface of .TTW_A: (same inputs) but I built it around BIOS INT 10h/AH=09h (write a character and attribute) to compare this behaviour with the one of BIOS INT 10h/AH=0Eh.

|
| Fig. C - Description of INT 10h/AH=09h taken from the delorie web page |
As you can see in Fig. C, INT 10h/AH=09h just puts characters on the screen but it neither updates the cursor position nor reacts to the special characters such as 0x0D (Carriage Return). To have quite the same behaviour as the INT 10h/AH=0Eh, I had to create a new procedure that was able to handle the special characters such as Carriage Return and also to update the cursor every time. In the end, the procedure _ColTTW (Color TeleType Write in the file <.\SWBIG-LIB\Color_TTW.asm>) was quite long and complex so I preferred to create a dedicated file rather than put it as a local function inside the main (as I did with .TTW_A:). I won't describe here in the post the procedure _ColTTW because I think that the comments on the file are very clear about how the procedure works.

|
| Fig. B - Partial view of the CheckTTW |
In Fig. D you can see a partial view of the main procedure CheckTTW (Check TeleType Writer). Somewhere in the code, the main procedure calls the local procedure .TTW: (TeleType Write) when it is time to write something on the screen. The procedure uses alternatively a local one built on the BIOS INT INT 10h/AH=0Eh (.TTW_A:) and an external procedure built on the BIOS INT 10h/AH=09h (_ColTTW:) based on an internal switch. In this way, I realized the direct comparison of the two different BIOS services and I showed that BIOS INT 10h/AH=0Eh ignores the value passed in the register BH. At this point, I describe the main procedure. First of all, I wrote a message on every video page (the one visible on the screen and all others); then I activated (I made it visible on the screen) each page one after the other. Once activated, I wrote a message on the same page asking the user what to do next. When the main was using BIOS INT 10h/AH=0Eh (.TTW_A:), then all lines went on page 0 meanwhile when the main was using BIOS INT 10h/AH=09h (_ColTTW:) one line went on each page individually as it should be. To be sure about the results, I also tested all the video modes that I could use (read the post "Test The Video Modes").

|
| Fig. E - Logic of CheckTTW |
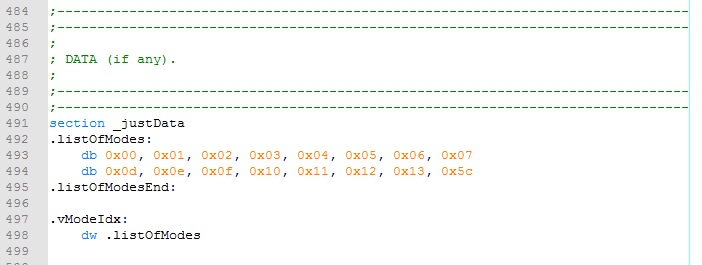
Fig. E shows the logic of CheckTTW. It is a never-ending loop that goes on until the user hits the "Esc"-key. The main loop goes over the different video modes as it finds them in the array .listOfModes:. Once the procedure reaches the end of the array, it restarts from the beginning of the same again, but this time it toggles the flag between the two versions of _TTW: (_TTW_A: and _ColTTW:). The innermost loop brings on the screen the video pages one after the other. For this purpose, the register CH holds the current video page that goes on the screen and CL the latest one that can be used. For the array .listOfModes:, I used the same convention as in my previous experiment (see Fig. B of the post "Experiments with the cursor").
Results
I omit the details about the debugging of the code since the procedure is the same as I explained in the post "How to debug the BIN-Files". Once I finished the development and debug of the software, I created the file SOFTWARE.BIG and I put it in the root folder of the D-Drive (the Test-partition). Then I rebooted the PC.

|
| Fig. F - Force boot from test partition |
In Fig. F, you see that I forced the boot from the D-Drive. If you what to know how to create a bootable test partition that looks for the file SOFTWARE.BIG and runs it, you can find the full description of all the necessary steps in Chapter VI.

|
| Fig. G - Screen output produced by BIOS INT 10h/AH=0Eh |
In Fig. G, you see how the screen looks like when the software uses BIOS INT 10h/AH=0Eh to bring messages on the screen. This demonstrates that BIOS INT 10h/AH=0Eh writes only on the currently active page regardless of the setting of the register BH (which according to Fig. A should tell the page number to use).

|
| Fig. H - Screen output produced by BIOS INT 10h/AH=0Eh |
Fig. H shows how the program continues. It switches from one page to the next one but it seems that nothing happens. The reason is that all pages are empty. When they get active, the program prompts the same message ("Press any key for next page... or press Esc to terminate.") which is always the same on every page thus giving the impression that nothing is happening. The feeling is that the program is not working because once you hit the keyboard no change seems to appear on the screen.

|
| Fig. I - Screen output produced by BIOS INT 10h/AH=0Eh |
Just on the last page of the currently selected video mode, you may notice a change on the screen (compare Fig. I with Fig. H ). After this point, the loop restarts selecting the next following video mode on the list (see Fig. E). It takes a bit of patience to let the program roll all the video modes and pages in such a way that it toggles the [.switch] and restarts all over again but this time using a different BIOS call.

|
| Fig. J - Screen output produced by BIOS INT 10h/AH=09h |
Fig. J shows the effect produced on the screen when using a different BIOS call, a BIOS call that writes on different video pages indeed. Every time the program activates a different page, you can see the corresponding video message that was previously written on it. From this point on, the program shows the behaviour that anyone would expect by reading the description in Fig. A. In this way, I demonstrated that the description in Fig. A is wrong about the usage of the register BH and teaches that testing on your own is always a good decision to take.
I hope that you enjoyed the reading of this post as much as I did in my learning experiment here.
Comments
Post a Comment