This post is going to be a long one for two reasons: first, I am verbose;
second, it is a lot to describe to do the setup. I structure this post in
paragraphs because it can help you reading and it helps me organizing my
working notes.
The test rig
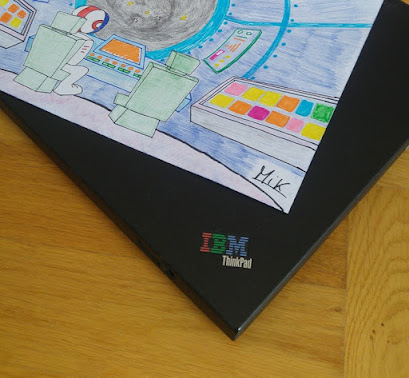
As Test rig, I have an IBM Thinkpad T41: a very good piece of hardware.
Now it is obsolete on many points of view, but this is not what it makes
it a very good piece of hardware. The T41, before being owned
by me and being my test rig, it was owned by the company I work for and
was my working notebook
1. With it I performed all kind of tests on cars, recording data and
interacting with the engine control unit by changing parameters and doing
all what is needed for the job of a test driver. At that time I wasn't
even paying any kind of attention on the stress I was putting on my
notebook, I gave for granted that it worked without problems. My focus was
to test and stress the car I was responsible for. Looking back now, I know
it was a tremendous amount of stress for the hardware of my notebook too.
It was able to work and record data (it means to read and write from HDD)
while the car was travelling at any speed, on any road condition, with any
kind of shakes which, as a matter of fact where applied on the arm of the
HDD. In other terms, it means to operate the HDD and heavily shaking it at
the same time.
Summer and winter test can be very bad especially if you have to do winter
test during summer due to tight development schedule of the car. So here
is the scenario: during summer (let us assume it is a sunny day of July
with 30 °C outside) you have to perform engine cold start test to be sure
your car starts even on the very bad winter's days. So a day or two before
the test you put your prototype car with all measurements equipment
installed (including the notebook) in a very special fridge. Now besides
the fact that the fridge is very big such as you can put a car in, it is
indeed a complete laboratory room inside a fridge. There is the chassis
dynamometer, the exhaust gas measurement device and so on. All that is
needed to simulate road condition in such a way that you can operate the car.
The day of the test everything inside the fridge is at -25°C (but
sometimes we did -30°C and even -35°C) including the notebook. By the way,
my wife is wondering why I am the only one in our group of friends and
relative that got very bad cold during summertime, but I guess my body was
not that happy to do temperature jumps from -25°C to above 30°C. But now
the focus is on the notebook. Now I am not a designer of HDD, but I guess
that as the car was having a hard time to fire-up the engine in cold
condition, the same would have been for the HDD to boot the notebook. The
worst part of it is when the test is over. Since we are always on a tight
schedule we have to take the car out of the cold chamber and let another
car in to cool down overnight for the testing schedule of another
colleague for the day after. When you see it for the first time is really
nice: the atmosphere inside the chamber is very dry so it is damn cold but
not "white". There is no ice on the walls of the chamber, nor on the car.
But when you take the car out, it is like a huge block getting immediately
white and full of ice. Almost the same happens with the notebook, it gets
wet all together, but we are on a hurry to go back to the desk and start
analyzing data, so we just wipe a bit the screen, the keyboard and move
on. During my reading on
The Starman's Realm
I realized how bad I was with my notebook. If you go there and read you
will find things like you shouldn't operate your HDD at low atmospheric
pressure, meaning in high altitude2, well I did that too in Peru` for the high altitude test on the car. Of
course, the engines don't like high altitude because of lack of oxygen so
we had to test and adapt the engine's software to apply countermeasure to
keep good combustion going even in those conditions. By the way, the human
brain also needs oxygen and the high altitude tests are the worst of them
all. Likely I had to do that only 2 times in my life, and I try to avoid
them as much as I can. That is everything else but not fun (if you want to
make yourself an idea about that watch the
"Top Gear Christmas special south America". They went to Chile up to 17064 Foots or 5200 Meters). So after all of
this and with some 10 years of operation, I run a check disk on the HDD.
Guess how many bad sectors were there? Only one! That's what I mean when I
say it is a good piece of hardware. As a mechanical engineer, I love good
quality things and made robustly to last. For me, the fact that my T41 is
not the fastest or the biggest in terms of storage and RAM capacity are
not parameters I am measuring it but rather its robustness, and this is
the reason why I say: It is a good piece of hardware!
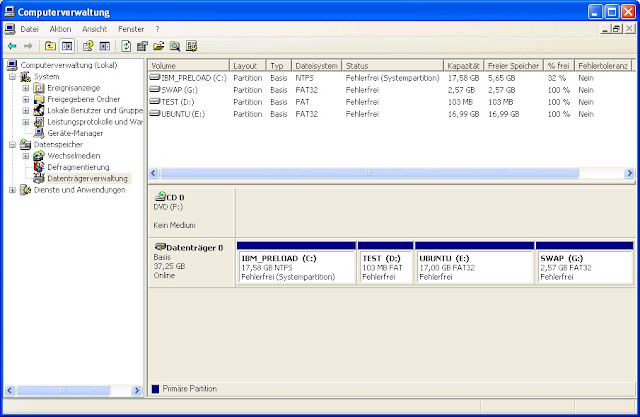
Having said all that, let's go back on track and talk about the setting of
the T41. It has XP on it, and I want to keep it because of the DEBUG.EXE.
I want to add Linux, plus a partition to do my experiments on it. This
took me already a couple of months to set all this properly. I will tell
my experience with that in such a way you can potentially avoid some
mistakes I did and make your setup take shorter than it took to me. Giving
the fact that XP was available and proved stable on that PC, I started
concentrating on Linux meaning that I formatted it all and tried different
version. One problem that Linux has with the T41 is the wireless
connection. I find confirmations about this problem in forums by many
other users with an IBM T41 struggling to make it work with Linux/Ubuntu.
In the end, I was not able to identify the root cause for it but I did a
lot of experiments: the fact is that the WiFi is working perfectly up to
Ubuntu 10 with Kernel 2.6 (I have Kernel 2.6.32-72-generic), with any
version higher than that it is not working well at all. In theory, it is
possible to attempt a Kernel to OS-Version mismatch (meaning try to run
Ubuntu 12 on Kernel 2.6) but either it wasn't working well or I wasn't
able to do it in the right way. So after all the trials, I decided to stay
with Ubuntu 10 and I restarted from scratch to set up my test rig.
Setup GRUB2 to make the PC boots from the test area
What is the GRand Unified Bootloader (GRUB)? In my opinion, it is a mini
Operative System specialized on the task of booting any other OS after
itself. Unfortunately due to this high degree of specialization in booting
whatever the user feels like to boot, it is downgraded in the common
opinion to the rank of a boot loader. Since my definition of GRUB is the
one of being it a mini OS it is clear that my opinion is closer to the one
of Gordon Matzigkeit (programmer and project initiator/coordinator of
GRUB). GRUB has been continuously developed until version 0.97 and after
that, it got a quantum leap in its development. To acknowledge that, the
GRUB @ version 0.97 has been frozen under the name GRUB Legacy and the
newly developed software has got the name of GRUB2. Now is time for you to
study GRUB2 from the material that I found on the free software foundation
web site:
Now that you have studied the GRUB2 manual and you know of what it is
capable of, you can eventually agree with me that this software is indeed
a mini OS that can perform many tasks. One of these tasks is the main one:
to boot almost anything else after itself. But it is unfair to downgrade
it to the rank of a simpler boot loader looking only at this feature and
forgetting the rest. To explain a bit further my point of view let's
consider some features that GRUB2 has and that we typically expect to find
in any OS. GRUB2 understands different file systems (such as FAT, NTFS,
EXT4, etc.) and can directly search read and write files from the HDD as
an OS would do. This implies a lot in terms of hardware management
capability of an HDD. The same can GRUB2 do from CD/DVD or Ethernet. GRUB2
can also modify the display and accommodate a graphic user interface for
its boot menu with a very high degree of customization that includes
screen resolution and colour management. It can even set a background
picture rather than just a black screen. Such level of video management
capability is a kind of minimum requirement and expected in any OS. GRUB2
has also a command line terminal where the user can instruct the PC to
perform determined actions by issuing a command or even to load software
in memory and pass control to it. This is definitively a capability of OS.
The only difference here between any OS and GRUB2 is that in the case of
any OS, it loads and starts a software who is intended to return control
to the OS (sooner or later) once it is terminated so the OS remains awake
behind the scenes to be ready to take over when the software on stage is
done with its performance. On the other hands the purpose of GRUB2 is to
load very special kinds of software (another OS) that will NOT terminate
and does NOT require the intervention of GRUB2 once again, so GRUB2 isn't
going to stay awake in any manner and its
"loading and give control" approach is less complicated than other
operative systems, nevertheless, you see really that the core capabilities
and behaviours of GRUB2 are the ones typically of any other OS.
Having said that it's time to move on. GRUB2 has been very slightly
modified or let's say customized for Ubuntu so we have to take a look on
this documentation as well:
And here comes my understanding of all of that: GRUB2 looks into
/boot/grub/grub.cfg to perform a series of
actions including setting up and displaying a multi-boot menu on the
screen, which is aligned to the wishes of the user (or let's say the
administrator) who has written them down in the grub.cfg file and this is
the core of it. You can write from scratch or modify an existing grub.cfg
file (which by the way is a plain text file) if you want, but it is
strongly recommended NOT to do so. Why? The reason is that a function in
Ubuntu has been implemented that writes or better overwrites this file
every time the user (or software) invokes the command
update-grub3. The advantage of it is that at installation, or during a kernel update,
or major version update of Ubuntu, the grub.cfg file can be updated to
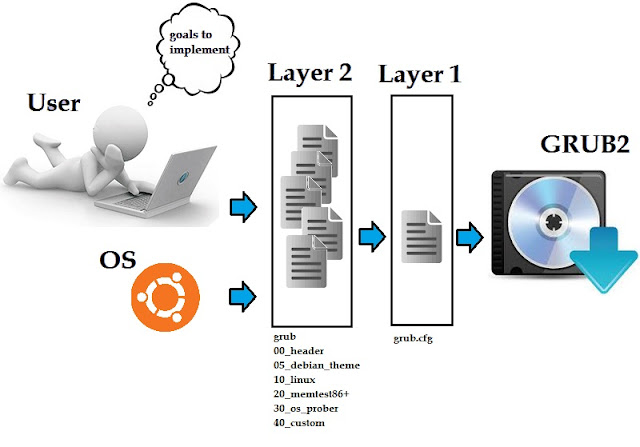
reflect the changes in the system. The disadvantage of it is that we have
another layer between the user and his/her idea about what GRUB2 has to do
and the way to instruct GRUB2 to do what the user wants it to do (Fig. Y).
|
|
Fig. Y - Layers until GRUB2
|
It turns out that since the mechanism is the one described before, one can
modify staff in Layer 2, then run the
update-grub command and read in layer 1 the
effects of the modification to see (better read grub.cfg file) if
something went wrong even before rebooting the system. In a way, there is
a smaller feedback loop between the goals the user wants to implement and
the implementation itself. Now let's have a look on some modifications I
did to Layer 2 in order to make GRUB2 boot from my TEST partition on HDD.
First of all, I wanted to remove the countdown from the boot menu just
because of personal taste. So here follow the steps to accomplish that. As
we can observe the effect is to have the same value on the two branches of
the IF-statement whether or not there was an error by the previous attempt
of loading an OS.
[...]
if [ ${recordfail} = 1 ]; then
set timeout=-1
else
set timeout=10
fi
[...]
[...]
# GRUB_TIMEOUT=10 # this is the original one
GRUB_TIMEOUT=-1 # this is the modified value
[...]
[...]
if [ ${recordfail} = 1 ]; then
set timeout=-1
else
set timeout=-1
fi
[...]
A second modification I want to implement is to change the screen
resolution for the boot menu. Before doing any change I first rebooted my
PC, then on the grub menu I pressed "c" to get the command prompt and I
typed
vbeinfo. Here I get all the possible screen
resolution supported by my video, I noticed one on paper to enter this
value later on for the modification I want to make. Here follow the steps
to accomplish that.
[...]
if loadfont /usr/share/grub/unicode.pf2 ; then
set gfxmode=640x480
insmod gfxterm
insmod vbe
if terminal_output gfxterm ; then true ; else
# For backward compatibility with versions of
# terminal.mod that don't
# understand terminal_output
terminal gfxterm
fi
fi
[...]
[...]
# The resolution used on graphical terminal
# note that you can use only modes which your graphic card
# supports via VBE
# you can see them in real GRUB with the command `vbeinfo'
#GRUB_GFXMODE=640x480 # this is the original one
GRUB_GFXMODE= 1024x768x32 # this is the modified value
[...]
[...]
if loadfont /usr/share/grub/unicode.pf2 ; then
set gfxmode=1024x768x32
insmod gfxterm
insmod vbe
if terminal_output gfxterm ; then true ; else
# For backward compatibility with versions of
# terminal.mod that don't
# understand terminal_output
terminal gfxterm
fi
fi
[...]
The final step is to setup GRUB2 to boot from the Test partition on the
HDD. To do so we will copy the structure of the "Windows XP" boot in the
file /etc/grub.d/40_custom and modify it.
The information we need for the modification is the unique identifier of
the partition. To find it out we use the command
blkid in the terminal. In Fig. Z we see the
required info for each partition including the one with label "TEST". With
this information, we can perform the final part of our modification.

|
|
Fig. Z - blkid in terminal
|
We copy the entry from grub.cfg and we paste it in 40_custom and perform
the following settings:
-
Set a name for the menu entry such as "Boot TEST (on /dev/sda2)"
- Change the file system from ntfs to fat16
- Set the root to the second partition
- Set the identification number of the partition
[...]
### BEGIN /etc/grub.d/30_os-prober ###
menuentry "Microsoft Windows XP Professional (on /dev/sda1)" {
insmod ntfs
set root='(hd0,1)'
search --no-floppy --fs-uuid --set 26F4C476F4C44A2F
drivemap -s (hd0) ${root}
chainloader +1
}
### END /etc/grub.d/30_os-prober ###
### BEGIN /etc/grub.d/40_custom ###
# This file provides an easy way to add custom menu entries.
# Simply type the menu entries you want to add after this
# comment. Be careful not to change the 'exec tail' line
# above.
### END /etc/grub.d/40_custom ###
[...]
#!/bin/sh
exec tail -n +3 $0
# This file provides an easy way to add custom menu entries.
# Simply type the menu entries you want to add after this
# comment. Be careful not to change the 'exec tail' line
# above.
menuentry "Boot TEST (on /dev/sda2)" {
insmod fat16
set root='(hd0,2)'
search --no-floppy --fs-uuid --set 4065-3BDA
drivemap -s (hd0) ${root}
chainloader +1
}
Finally, we run the command update-grub and
see the changes in grub.cfg.
[...]
### BEGIN /etc/grub.d/30_os-prober ###
menuentry "Microsoft Windows XP Professional (on /dev/sda1)" {
insmod ntfs
set root='(hd0,1)'
search --no-floppy --fs-uuid --set 26F4C476F4C44A2F
drivemap -s (hd0) ${root}
chainloader +1
}
### END /etc/grub.d/30_os-prober ###
### BEGIN /etc/grub.d/40_custom ###
# This file provides an easy way to add custom menu entries.
# Simply type the menu entries you want to add after this
# comment. Be careful not to change the 'exec tail' line
# above.
menuentry "Boot TEST (on /dev/sda2)" {
insmod fat16
set root='(hd0,2)'
search --no-floppy --fs-uuid --set 4065-3BDA
drivemap -s (hd0) ${root}
chainloader +1
}
### END /etc/grub.d/40_custom ###
[...]
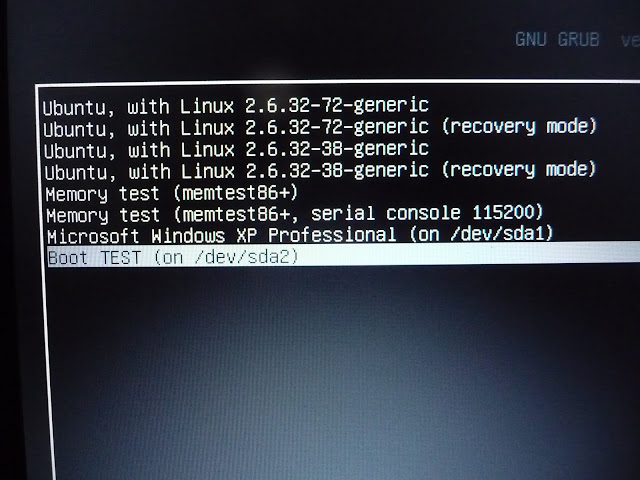
Now that everything is set the moment of the truth comes: reboot and see
what happen. Indeed we have a new menu entry (Fig. AA) that allow us to
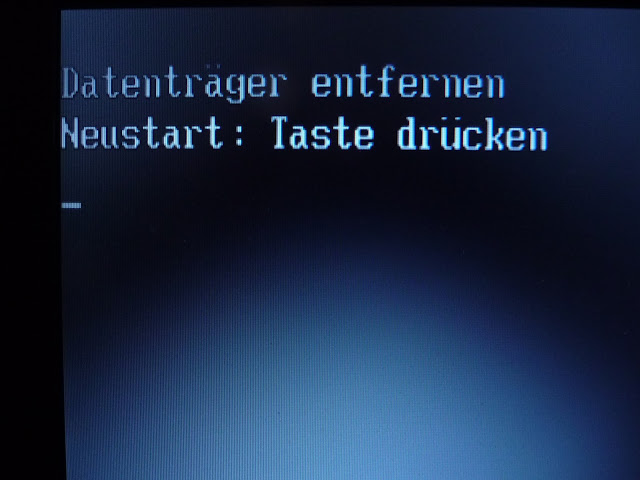
boot directly from the partition 2 which of course is equivalent to a
floppy without OS on it (Fig. AB). With this, we have concluded the setup
of our test environment.
|
|
Fig. AA - new menu entry "Boot TEST"
|
|
|
Fig. AB - The "no system disk" error message in german
|
This was A LOT OF WORK to do! But from now on I have an HDD
partition that I can use in the same way as if it was a floppy drive.
Did you manage to do the same on your PC? Tell me in the comment.


Comments
Post a Comment